The 180 degree parallel open box mechanism is one of the most classic and practical structures in pop-up books. By combining parallel fold lines with side supports, the page can open into a stable three-dimensional box form that works well for gift presentation, scene building, and spatial storytelling.
It may look like a simple box at first glance, but the final result depends on paper stiffness, cutting accuracy, scoring quality, and folding order. Once those basics are handled correctly, the mechanism becomes very stable and serves as an excellent foundation for more complex pop-up designs.
Mechanism Category
Primary Category: Parallel Fold Structure
Subcategory: Box Mechanism
Opening Angle: 180 Degree Open Structure
Let's fold it together. Here are the step-by-step instructions:
Step-by-Step Guide
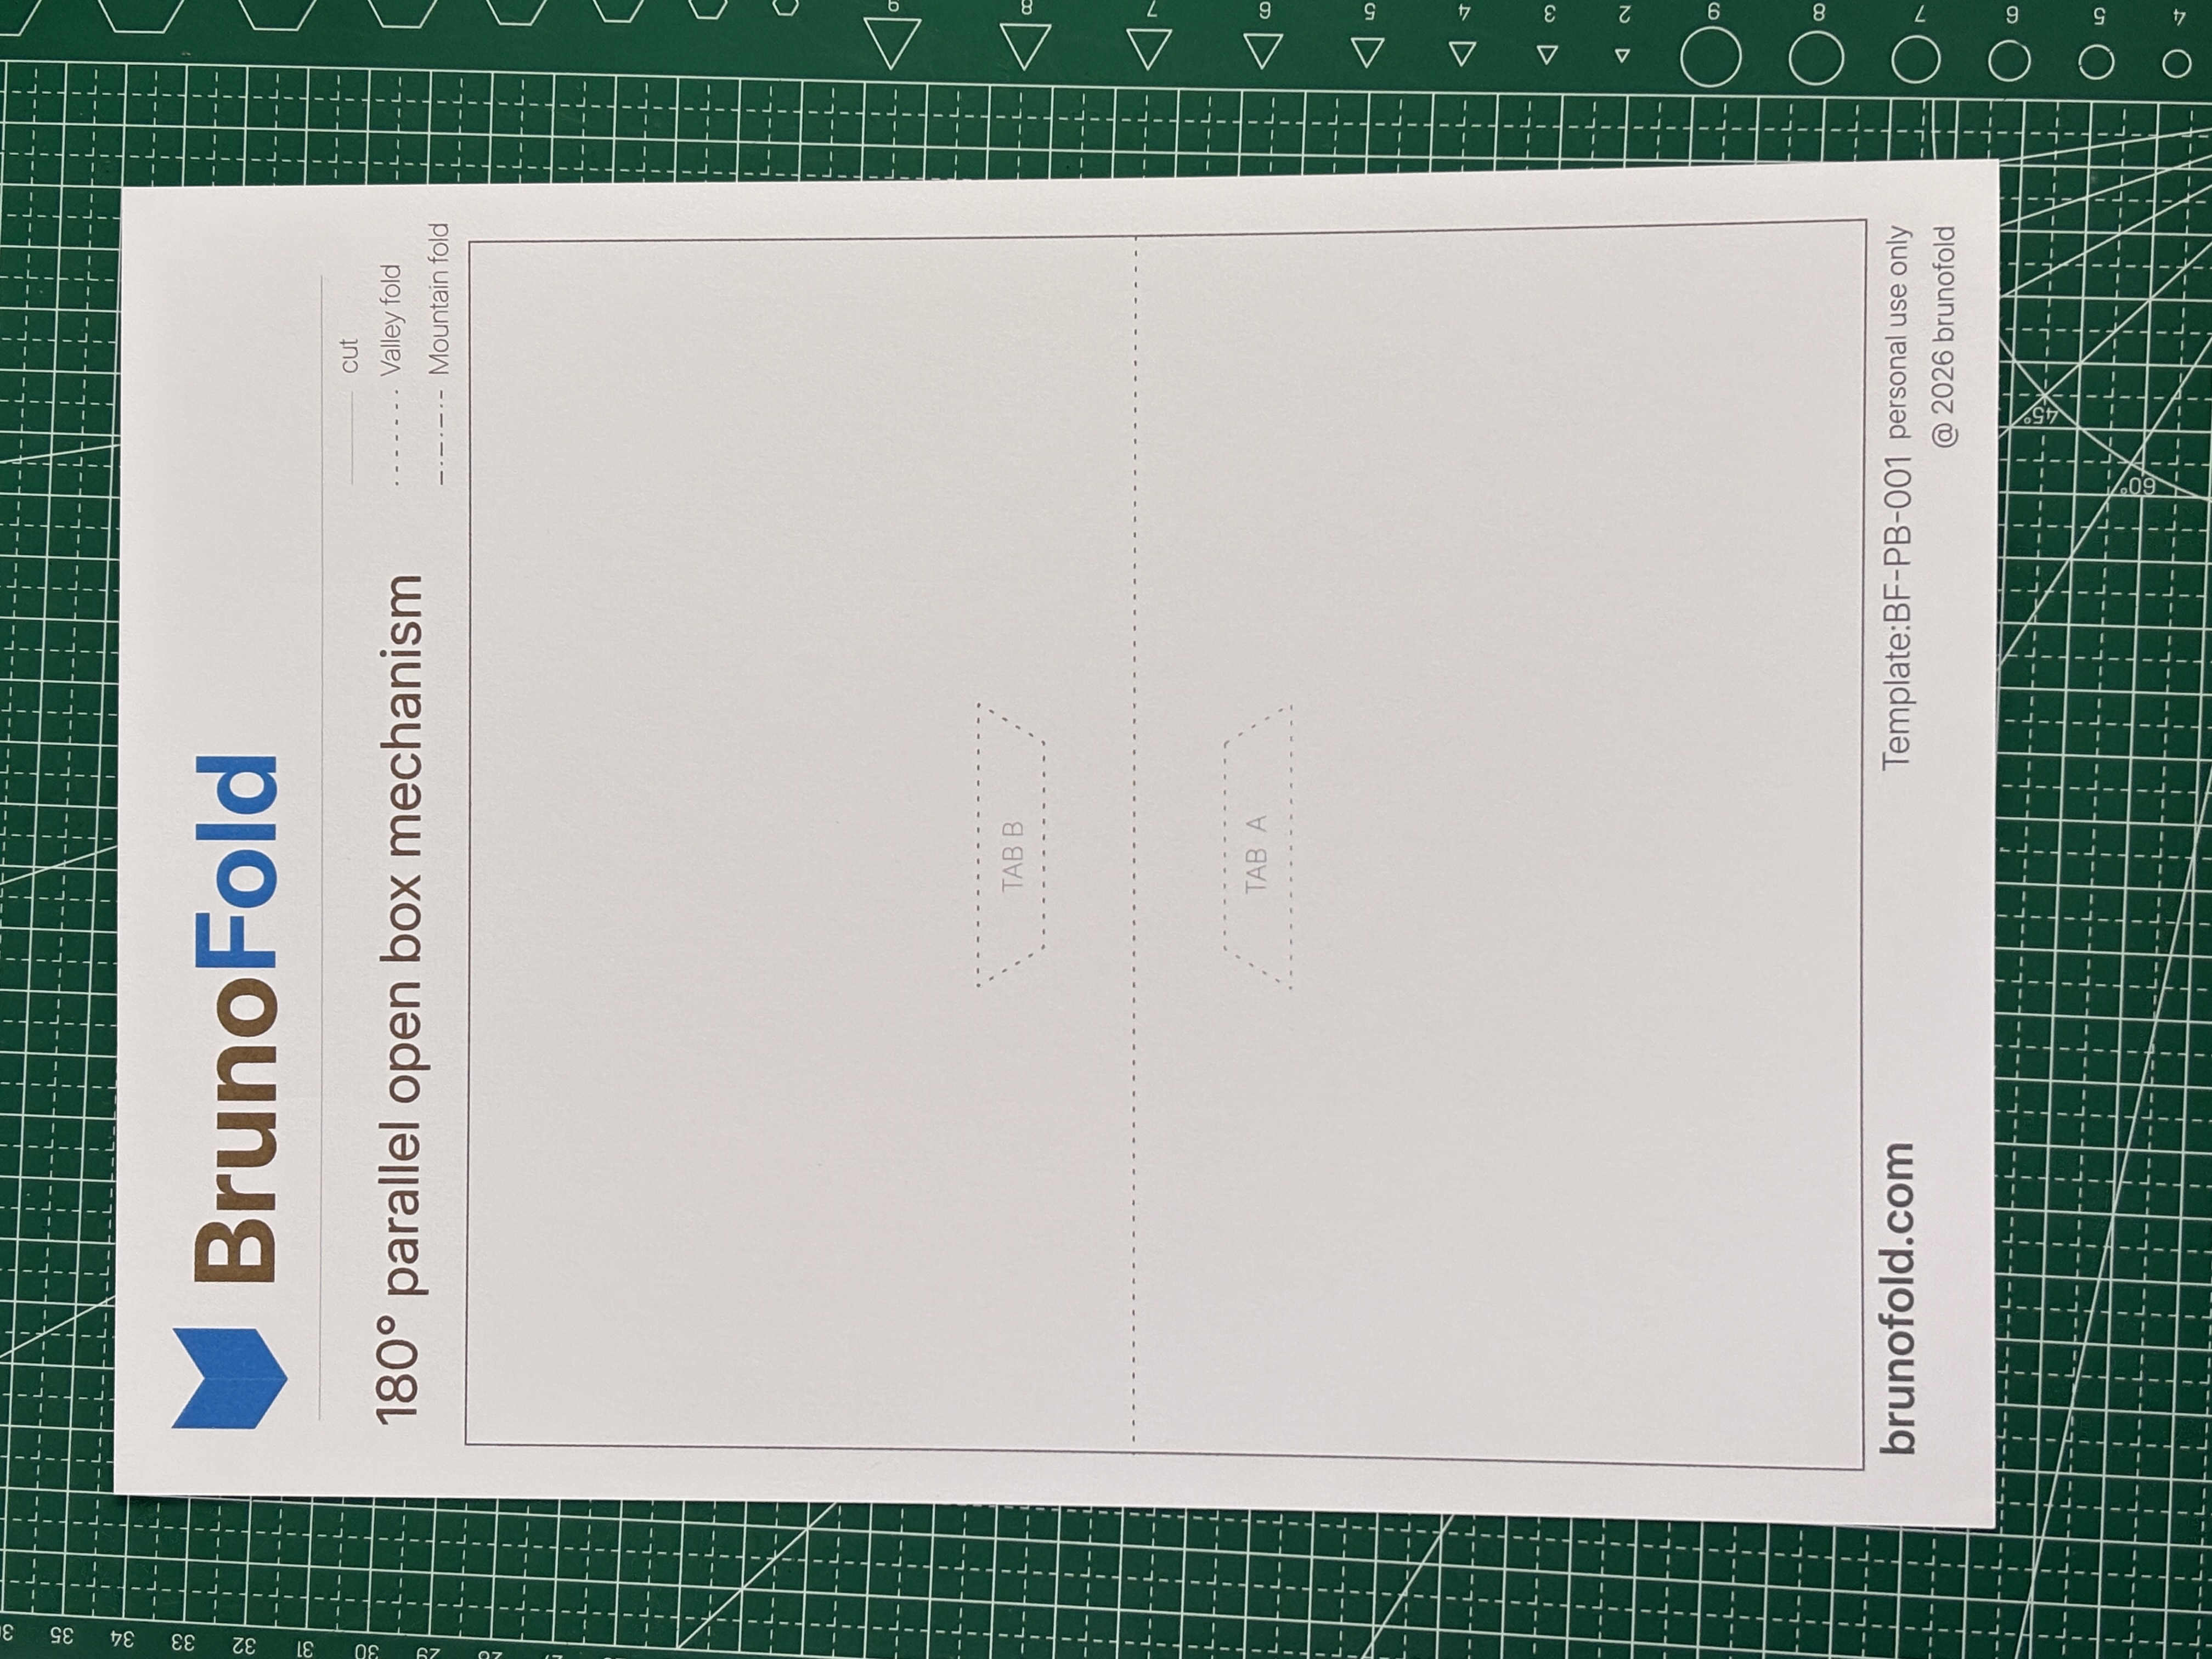
Step 1: Prepare the tools and materials
Before starting the 180 degree parallel open box mechanism, prepare the basic tools and materials first. This structure is a typical parallel-support pop-up mechanism. It relies on several parallel fold lines to form a stable three-dimensional box, so paper stiffness and cutting accuracy matter a lot.
Compared with a simpler fold structure, the box mechanism creates obvious volume when the page opens. If the material is too soft or the cutting is inaccurate, the structure can collapse, lean, or fail to open fully.
Materials and tools:
- 250g cardstock, preferably a rigid stock
- Craft knife or fine scissors
- Metal ruler
- Glue or double-sided tape
- Cutting mat
Material choice:
- A cardstock around 250g gives a good balance between foldability and structural support
- If you use thinner paper such as standard printer paper, the box edges can sag, the structure can deform, and the pop-up effect becomes weaker
Cutting advice:
- A craft knife with a ruler is recommended instead of cutting everything with scissors
- This mechanism includes many straight edges, and cutting precision directly affects alignment after folding
- If the edges are not straight, the box can twist or fail to close cleanly
Before you begin:
- Check that the template printed completely without scaling distortion
- Make sure the solid and dashed lines are both clear
- Secure the cardstock on the cutting mat before cutting so it does not slide
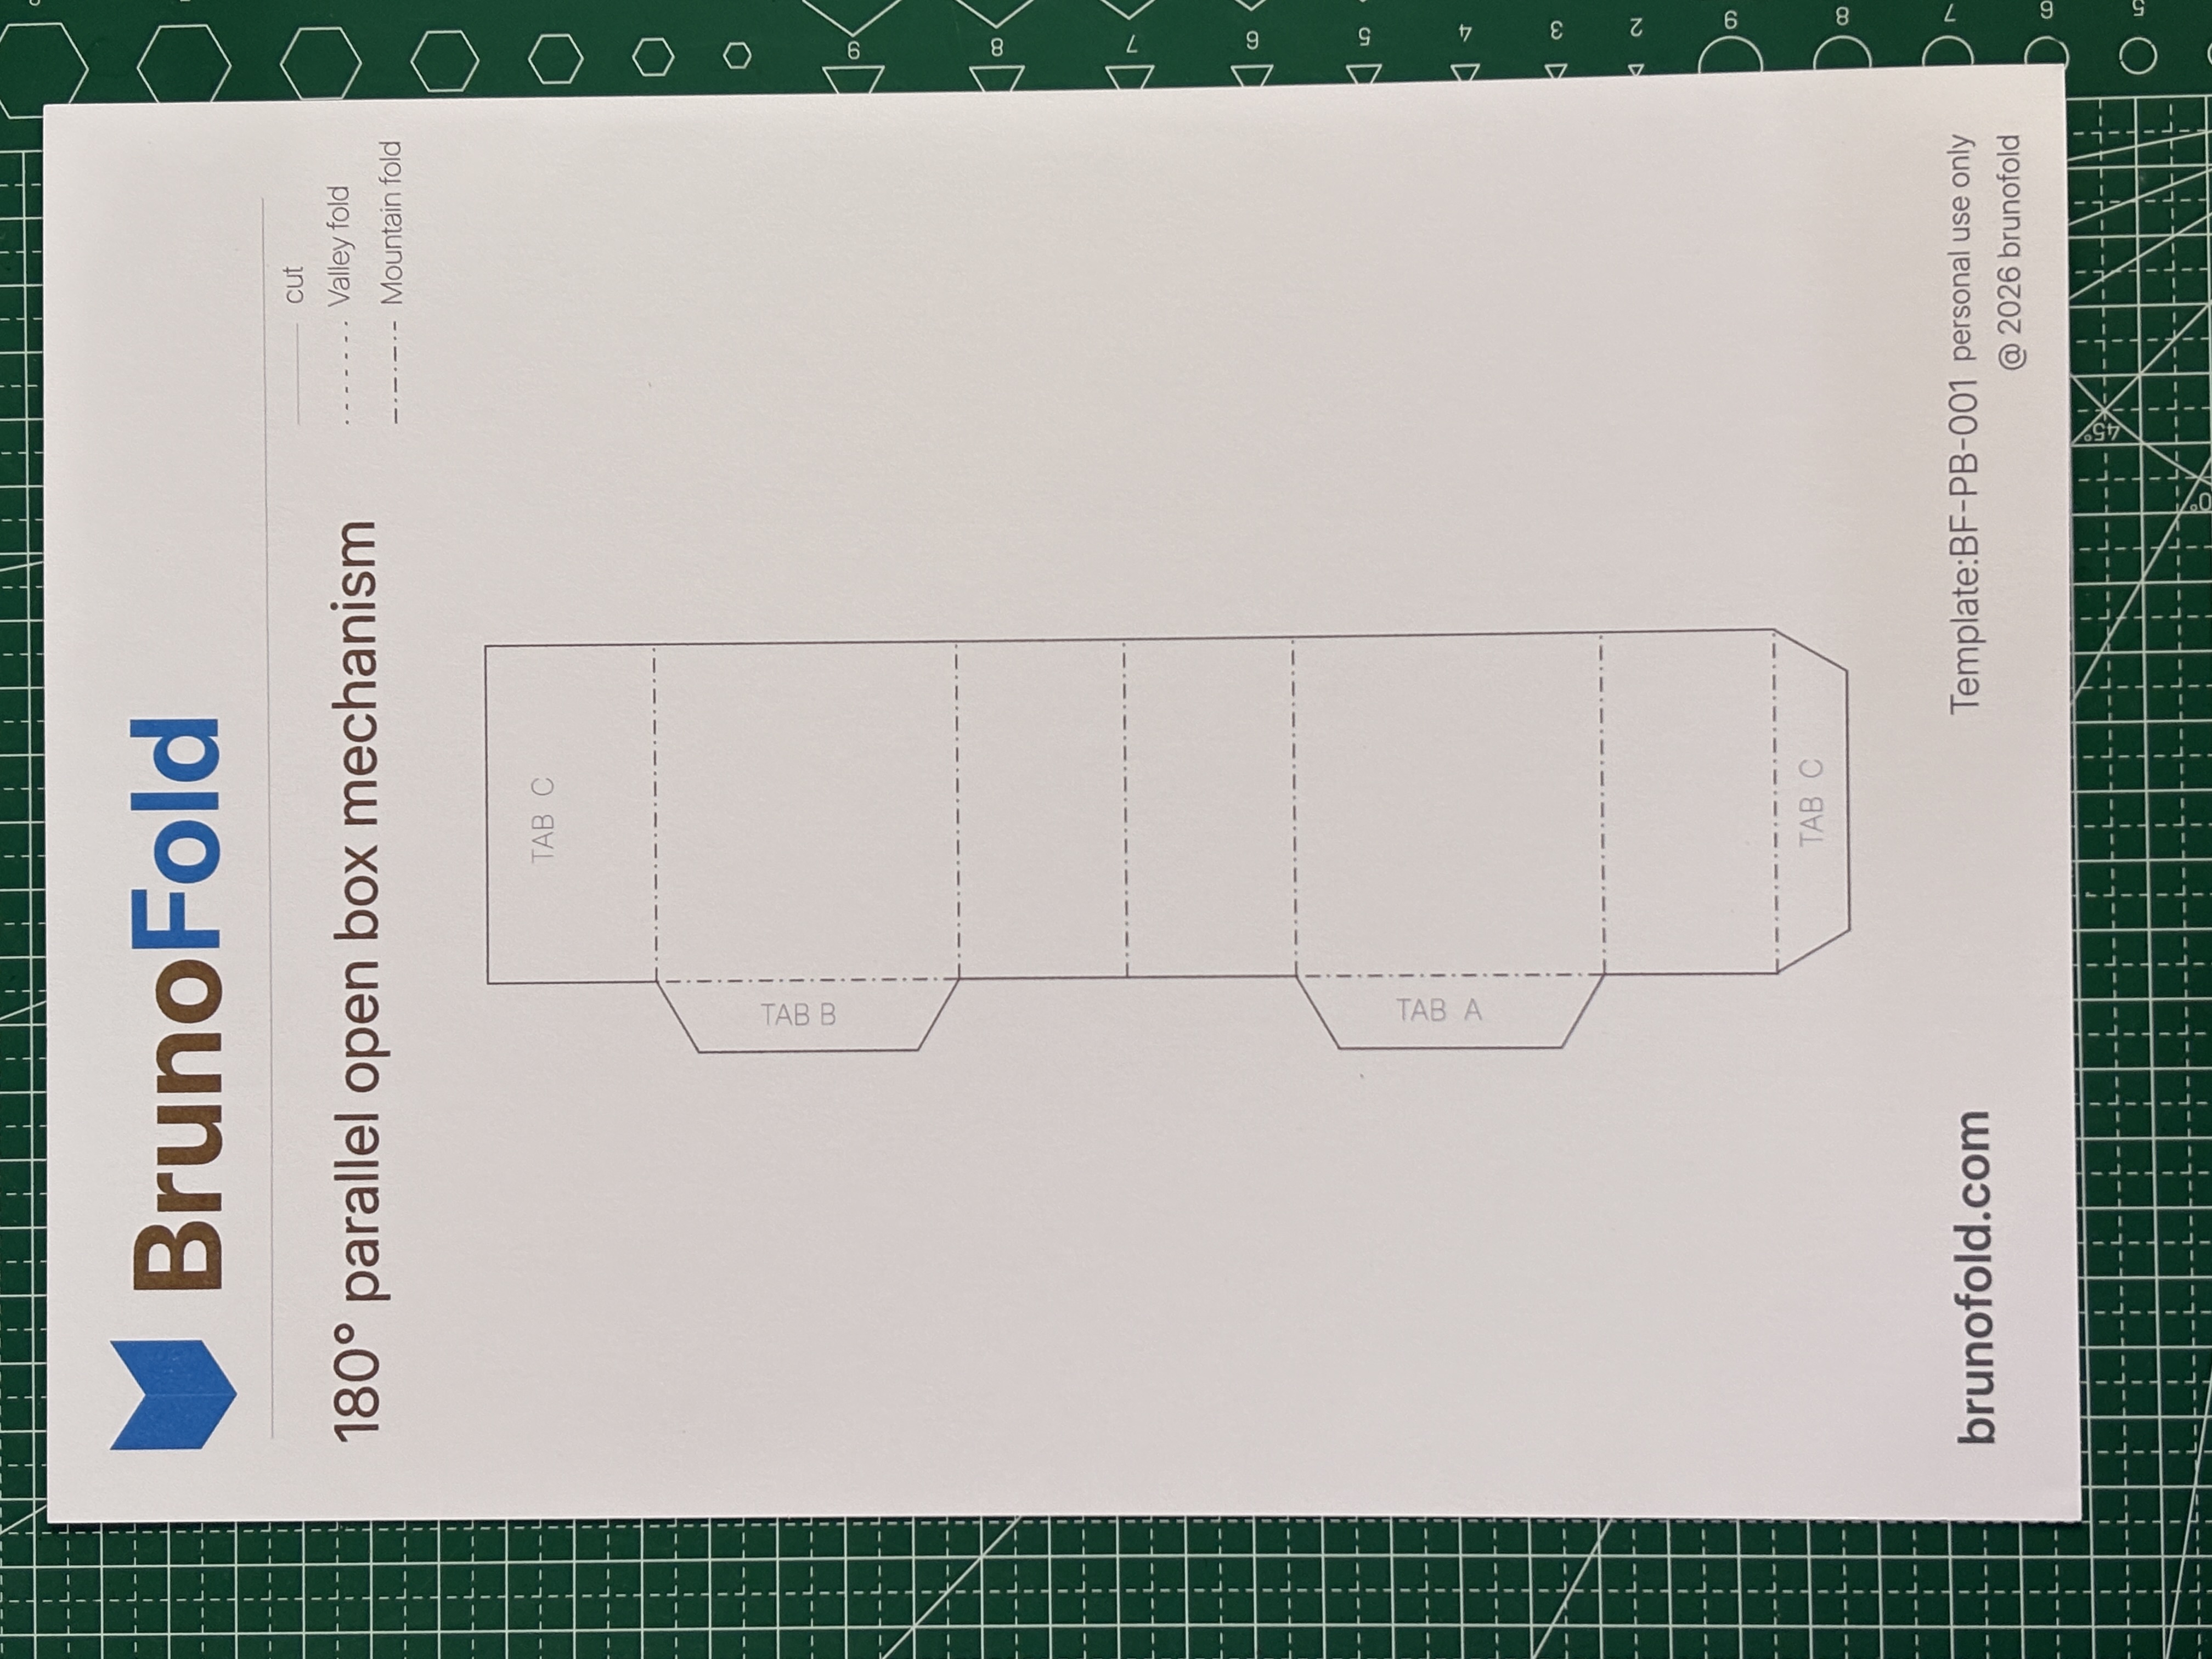
Step 2: Cut the template and score the fold lines
After the preparation stage, move on to the core groundwork: cutting and scoring. This step directly determines whether the later folds will move smoothly and whether the box structure can open in a stable way.
For the 180 degree parallel open box mechanism, the three-dimensional effect depends on precise straight cuts and clearly guided fold lines. If this stage is inaccurate, it becomes difficult to correct later.
Cutting instructions:
- Cut along the outer solid lines of the template first
- Use a craft knife with a ruler and try to complete each straight cut in one clean pass
- Avoid repeated cutting over the same edge, which can make the boundary rough
- Slow down at corners so the edges stay clean and sharp
Key points:
- Keep every edge as straight and clean as possible
- Even a small deviation can become obvious after folding
Scoring:
After cutting, do not fold immediately. The next step is to score along the dashed lines.
How to score:
- Use an empty ballpoint pen or a scoring tool
- Press lightly along the dashed lines with a ruler as a guide
- Do not cut through the paper; only create a clear guide crease
Why scoring matters:
- It helps the paper remember the folding direction
- It prevents the crease from drifting
- It keeps the final folds cleaner
- It reduces the risk of cracking, especially with 250g cardstock
Fold direction reminder:
- The template usually includes mountain folds
- It also includes valley folds
- It helps to distinguish these directions lightly during the scoring stage
Common mistakes to avoid:
- Folding directly by hand and ending up with crooked creases or distortion
- Skipping the ruler while scoring and getting messy folds
- Cutting uneven edges and making the box impossible to align
- Leaving the paper unsecured and causing the cut lines to shift
Completion check:
- All outer contours are fully cut
- All dashed lines are scored
- The crease lines are clear, but the structure has not been folded yet
- The whole piece still lies flat
Step 3: Fold the structure and form the box
After cutting and scoring, you reach the most important stage: folding and shaping the structure. This step determines whether the box rises smoothly and holds a stable three-dimensional form.
In a 180 degree parallel open box mechanism, the spatial effect comes from several parallel folds working together. That means speed is not the goal here. Accuracy is.
Recommended folding order:
- Start from the main fold line at the center
- Bring the fold out gently first instead of flattening it at once
- Deepen the crease gradually
- Then move to the parallel folds on both sides of the box
- Finish by adjusting the inner connecting folds, because these lines determine the box height
Folding technique:
A light multi-pass method works best:
- First pass: bring out the fold lightly
- Second pass: deepen the crease
- Third pass: press it fully into shape
This helps reduce:
- Cardstock cracking
- Crease drift
- Surface wrinkling
This is especially important when working with 250g cardstock.
Real-time opening test:
- Open the page gently to 180 degrees
- Close it again slowly
- Check whether the box rises and retracts naturally
The ideal result is:
- When opened, the box stands up automatically and the edges look neat
- When closed, the structure folds back without catching
- Overall, the left and right sides stay parallel without obvious leaning
Note: Step 1 uses dedicated English visuals. Steps 2 and 3 currently reuse the Chinese images because separate English versions were not provided.