The 180° box with a parallel platform pop-up mechanism is a paper-engineering structure that forms a three-dimensional box-like space when the spread opens fully to 180°, while keeping the upper and lower planes parallel. During the opening motion, fold lines and connecting faces work together to lift the surfaces gradually into a stable volume with a clean and symmetrical appearance.
This structure is often used in pop-up books as a display chamber, a product support structure, or a scene-building module for rooms, stages, and presentation boxes. Compared with a standard box mechanism, its defining features are the preserved parallel planes and the synchronized opening motion, which means folding accuracy and glue placement matter a great deal.
This guide walks you through template cutting, scoring, folding, and assembly so you can build a stable 180° box mechanism that opens and closes repeatedly with smooth movement.
Mechanism Category
Primary Category: 180° Three-Dimensional Structure
Structural Feature: Parallel Platform Structure
Mechanism Type: Box Mechanism
Popup Label: Popup Mechanism
Let's fold it together. Here are the step-by-step instructions:
Step-by-Step Guide
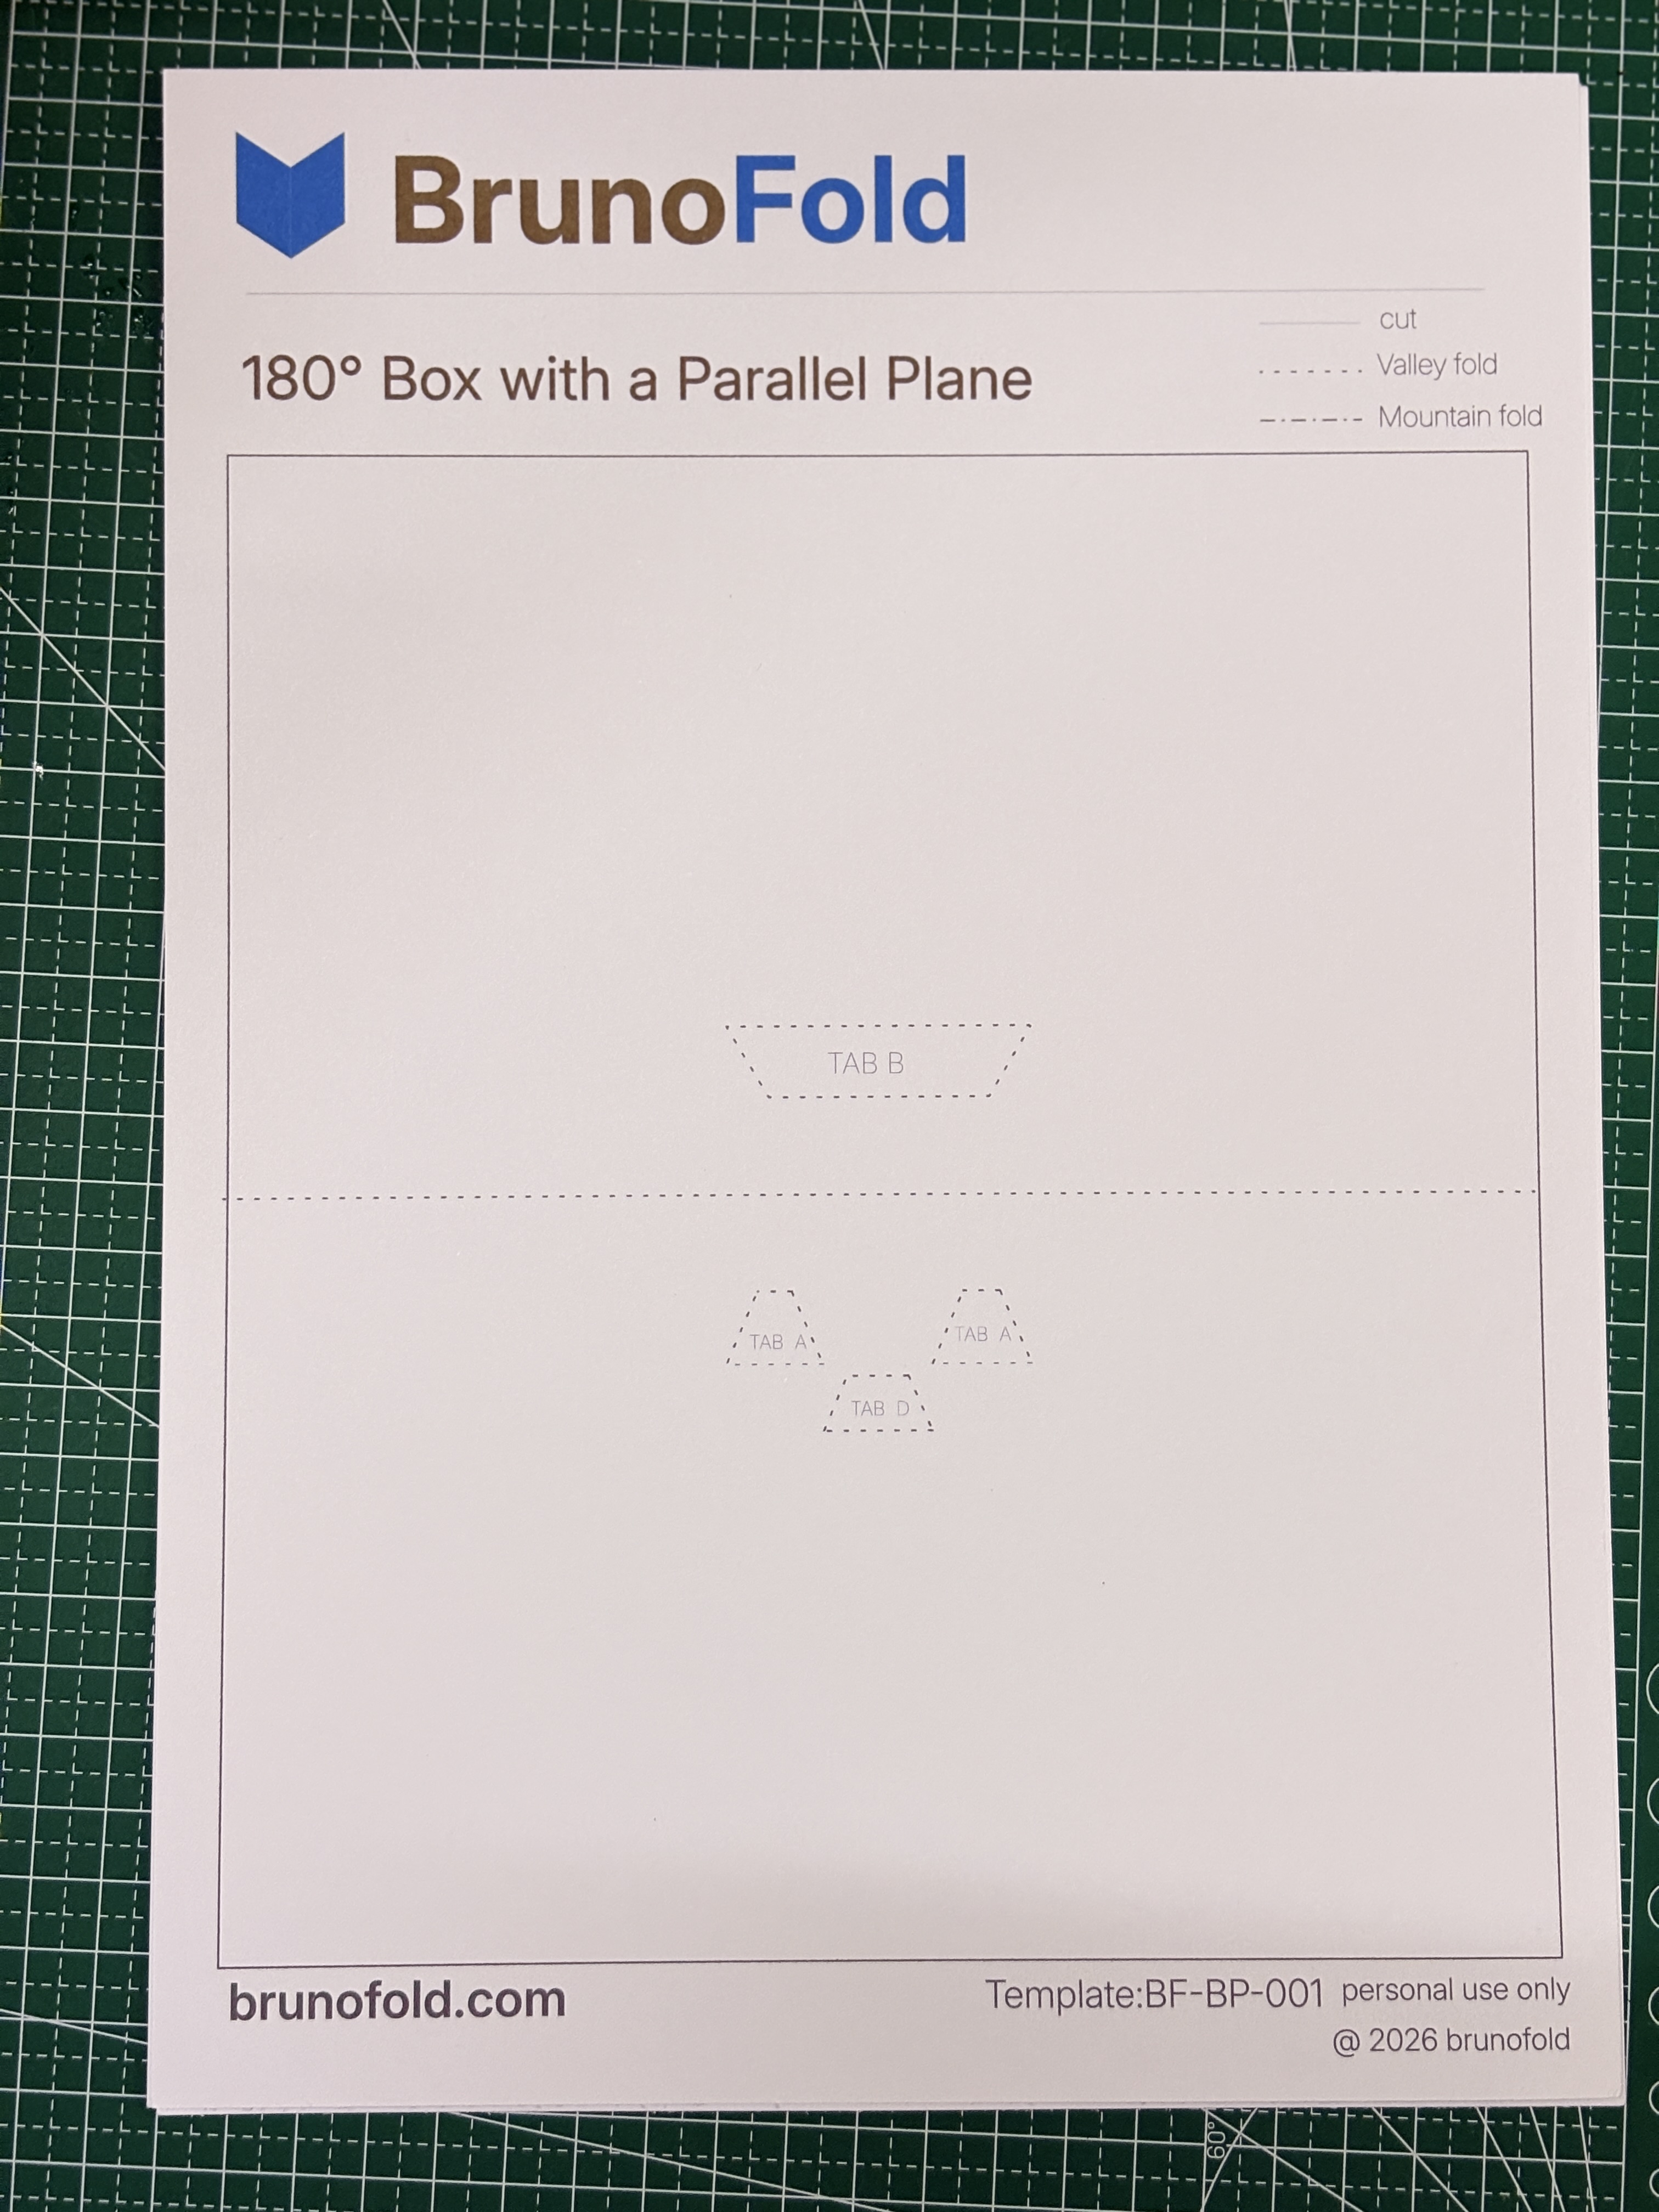
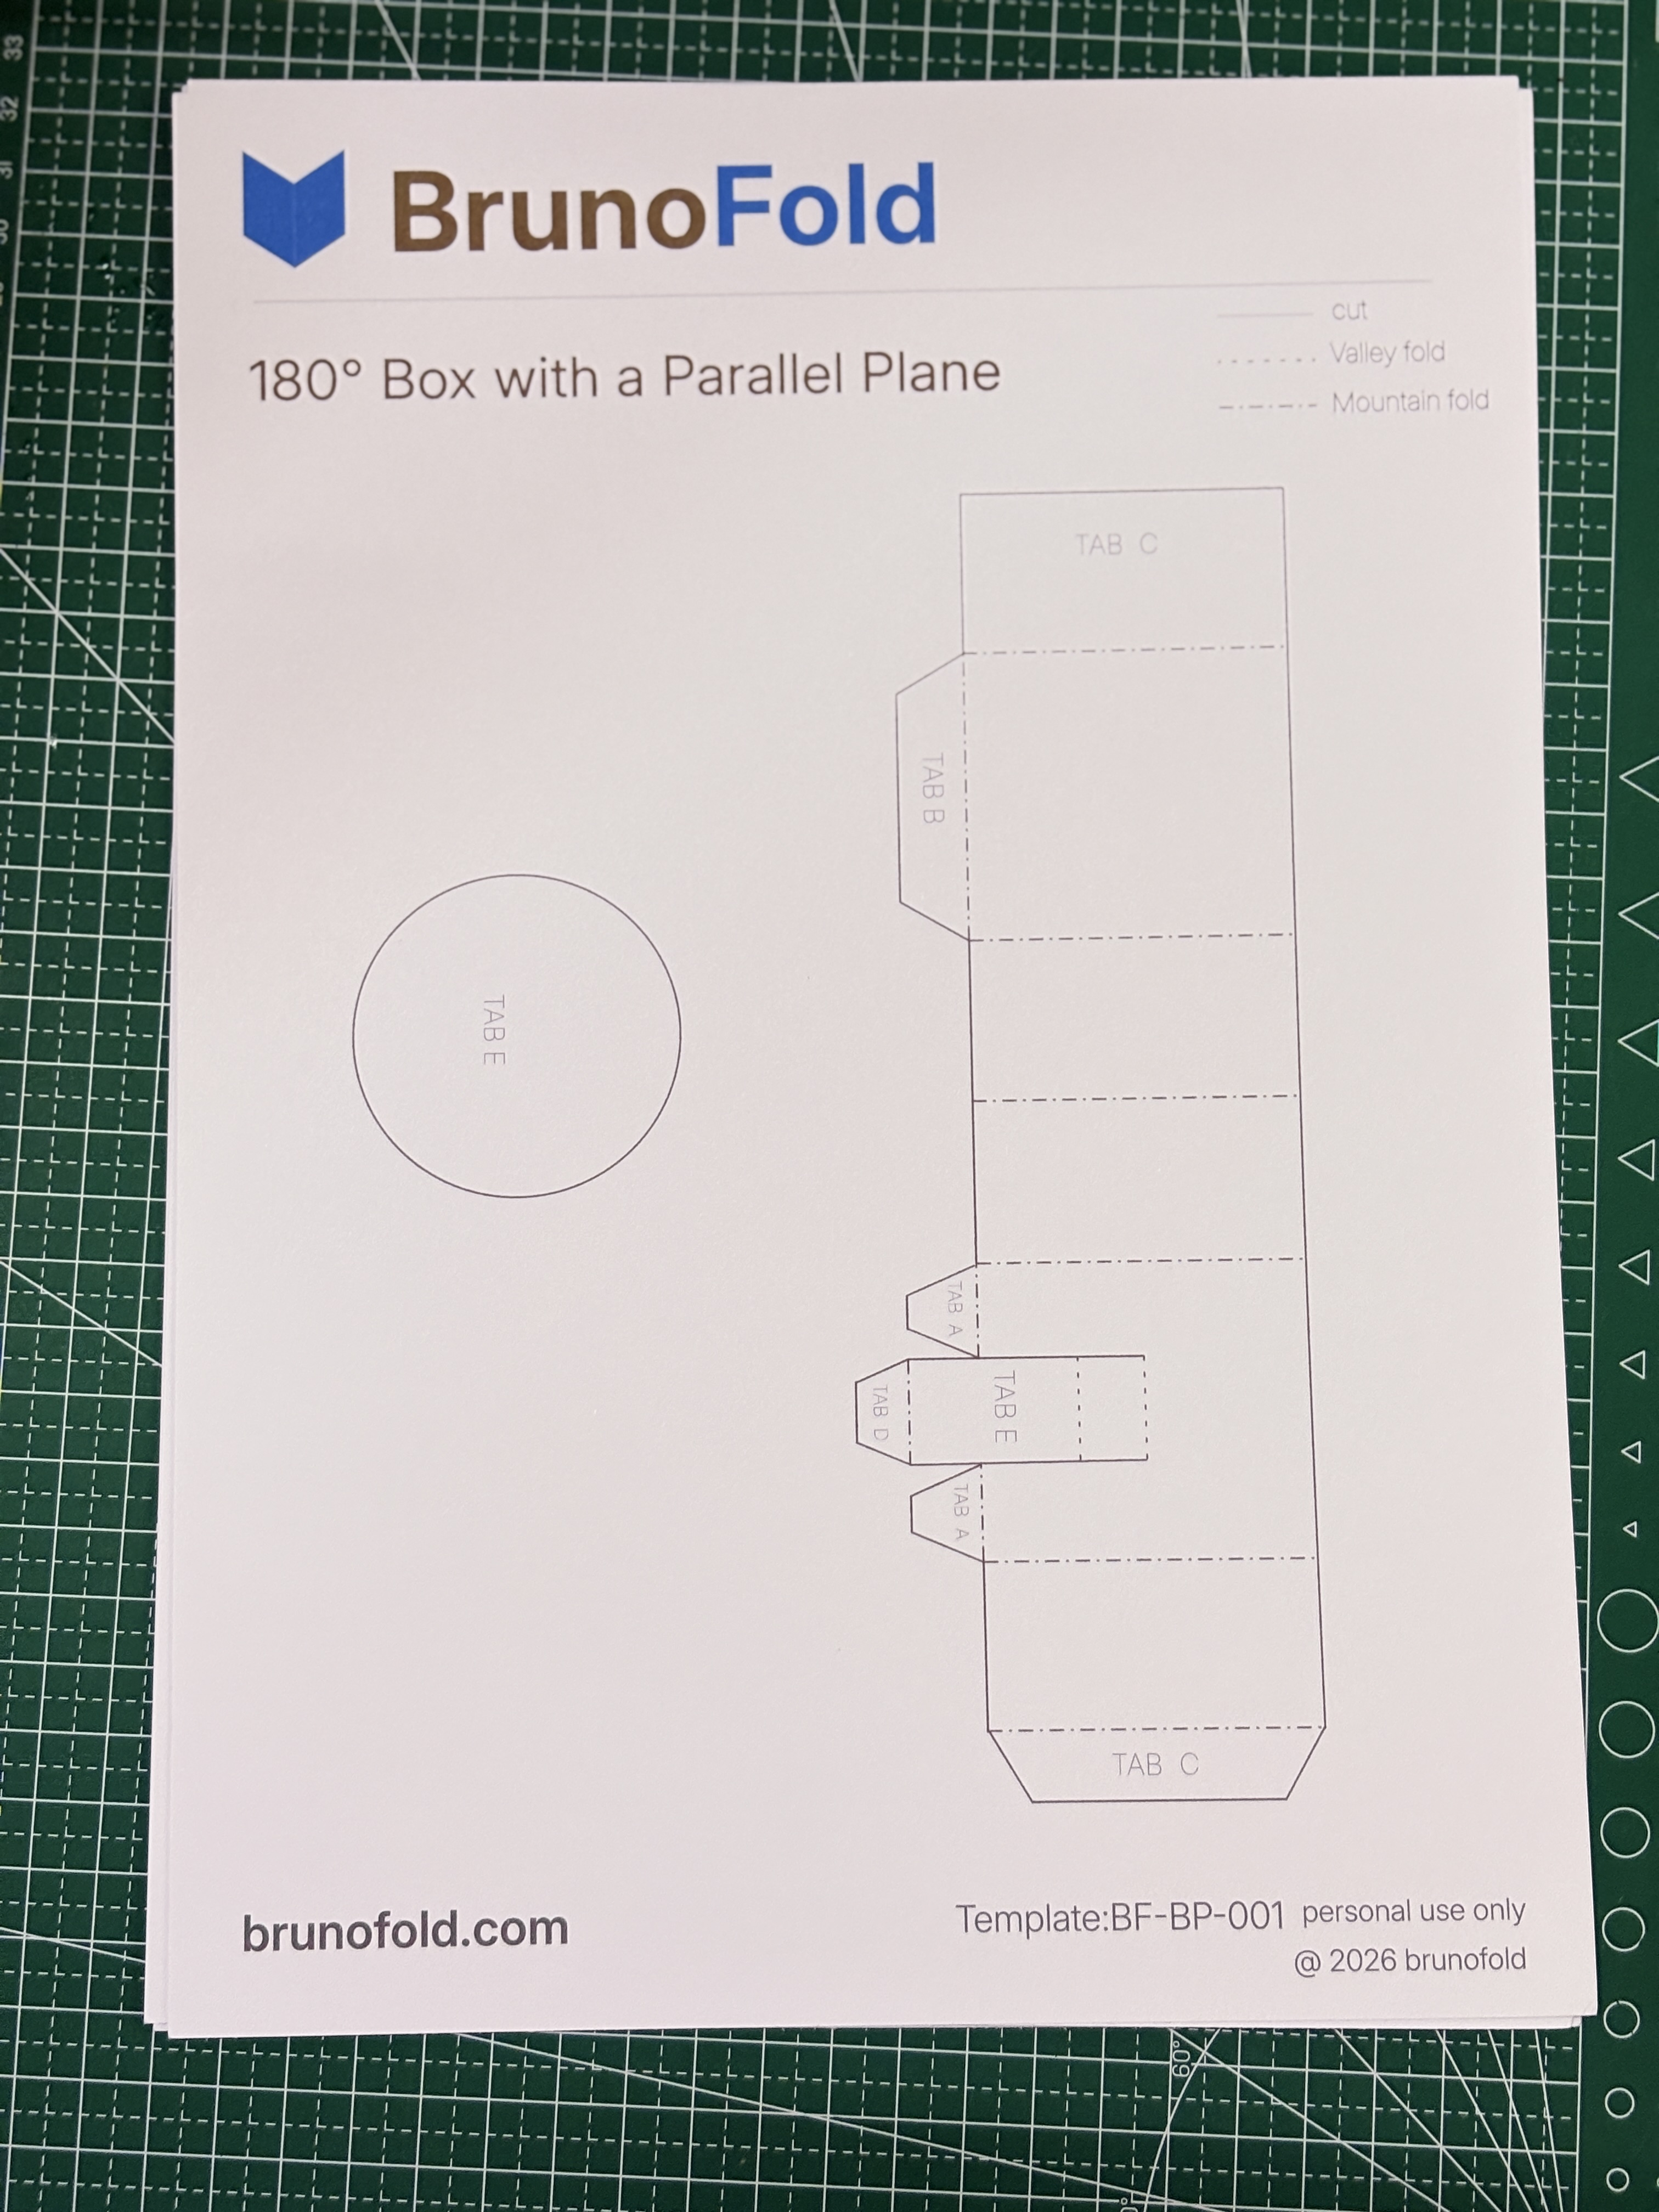
Step 1: Prepare the tools and print the template
Before making the 180° box with a parallel platform pop-up mechanism, prepare the basic tools and materials first. A stiffer cardstock in the 200g-300g range is recommended so the finished structure has enough support and stays stable after opening. Useful tools include scissors or a craft knife, a ruler, glue or double-sided tape, and a scoring tool such as an empty ballpoint pen.
Print the template at full size on the cardstock and make sure the print scale stays at 100% with no resizing. Otherwise, the structure will be harder to align accurately in later steps. After printing, take a moment to study the layout and identify the base plane, the upper platform, and the side panels that connect them. That overview will make the assembly process much smoother.
Step 2: Cut the template and score the fold lines
Cut carefully along the solid cut lines on the template and keep the edges as clean as possible, because rough edges can affect the final glue alignment. For inner details, a craft knife used with a ruler usually gives cleaner and more accurate results.
After cutting, move on to the critical scoring stage. Align a ruler with each dashed fold line and press lightly with a scoring tool to mark the creases. Scoring helps the cardstock fold in a controlled way and reduces the chance of crooked folds or bulging surfaces. In this mechanism, the angle relationship between several planes must stay accurate, otherwise the parallel platform effect will be lost.
Once the scoring is done, test the structure with a dry fold before gluing. This makes it easier to confirm that every crease moves smoothly and that the mechanism can open and close naturally.
Step 3: Fold and glue the structure
Fold along all scored lines to establish the basic form of the mechanism. Pay close attention to mountain folds and valley folds, and make sure each crease goes in the correct direction. That distinction is essential for getting the structure to pop up properly.
Next comes the gluing stage. Fix one side of the box structure first by attaching the glue tabs to the base plane, then glue the opposite side gradually so the whole mechanism forms a box-shaped volume that rises when the spread opens to 180°. While gluing, keep testing the opening motion so the upper and lower planes remain parallel and the side walls do not twist.
After assembly, open and close the piece a few times gently. If the mechanism rises into a clean and stable box-like space when opened, the build is complete.
Note: Step 2 and Step 3 currently reuse the Chinese visuals because separate English images were not provided.
Next Article
180 Degree Cone Mechanism Guide: From Sector Development to a Three-Dimensional Cone