Mechanism Category
Parallel Fold Structure.
Let's build it ourselves. Follow the detailed steps below:
Step-by-Step Guide
Step 1: Prepare the paper and tools
Before building the parallel fold pop-up structure, prepare the basic tools first. The right tools make the process smoother and improve both accuracy and final presentation.
Materials and tools:
- 250g Dutch cardstock (recommended)
- Craft knife or scissors
- Glue or double-sided tape
- Cutting mat
This paper weight gives the structure enough support while still folding cleanly, which makes it very suitable for pop-up mechanisms. If you do not have Dutch cardstock, other cardstock in the 200-300g range can also work.
Use scissors or a craft knife to cut along the solid lines in the template. If you want cleaner and more precise edges, use a craft knife together with a ruler.
Glue or double-sided tape will be used later to secure the structure. Double-sided tape looks cleaner, while glue usually provides stronger adhesion.
A cutting mat is strongly recommended. It protects the table and helps you make smoother, straighter cuts.
After printing the template, your setup should look similar to the image below: the template is printed on cardstock, placed on the cutting mat, and ready for cutting and folding.
Step 2: Cut the template and score the fold lines
After preparing the tools and printing the template, start by cutting the template. Follow the solid cut lines with scissors or a craft knife and ruler. Once the cutting is finished, the structure should look like the example shown below.
The next step is very important: scoring.
Why score the folds?
Because cardstock is relatively thick, folding it directly can create rough crease lines and may even distort the structure. Scoring first makes the later folds cleaner and more accurate.
How to score:
- Find the dashed lines in the template
- Align a ruler with each dashed line
- Use an empty ballpoint pen, scoring stylus, or another blunt tool to press along the line
- Apply enough pressure to leave a light groove in the paper
After scoring, the paper will fold more easily at those positions, helping the structure open flatter and look more dimensional.
Once the scoring is finished, you can move on to folding the structure into its first pop-up form.
Step 3: Fold slowly and test the motion
After cutting and scoring, you are ready for the most important stage: folding. There is no need to rush. Patience matters more than speed here. Since 250g cardstock is fairly stiff, applying too much force at once can bend the fold line off track and reduce the overall neatness of the finished structure.
The correct approach is to fold slowly along the scored dashed lines. Start by bringing the fold out gently so the paper follows the scored groove naturally, then deepen the crease little by little. If a section feels stiff, do not force it flat in one move. Fold it several times so the paper fibers can gradually adapt to the angle. This gives you cleaner lines and a more polished three-dimensional result.
While folding, lightly open and close the page to check whether the mechanism collapses and rises smoothly. If one fold line still feels weak, score it again slightly and continue adjusting. As long as the cutting and scoring were done accurately, the parallel fold structure will transform from a flat sheet into a clean pop-up shape at this stage.
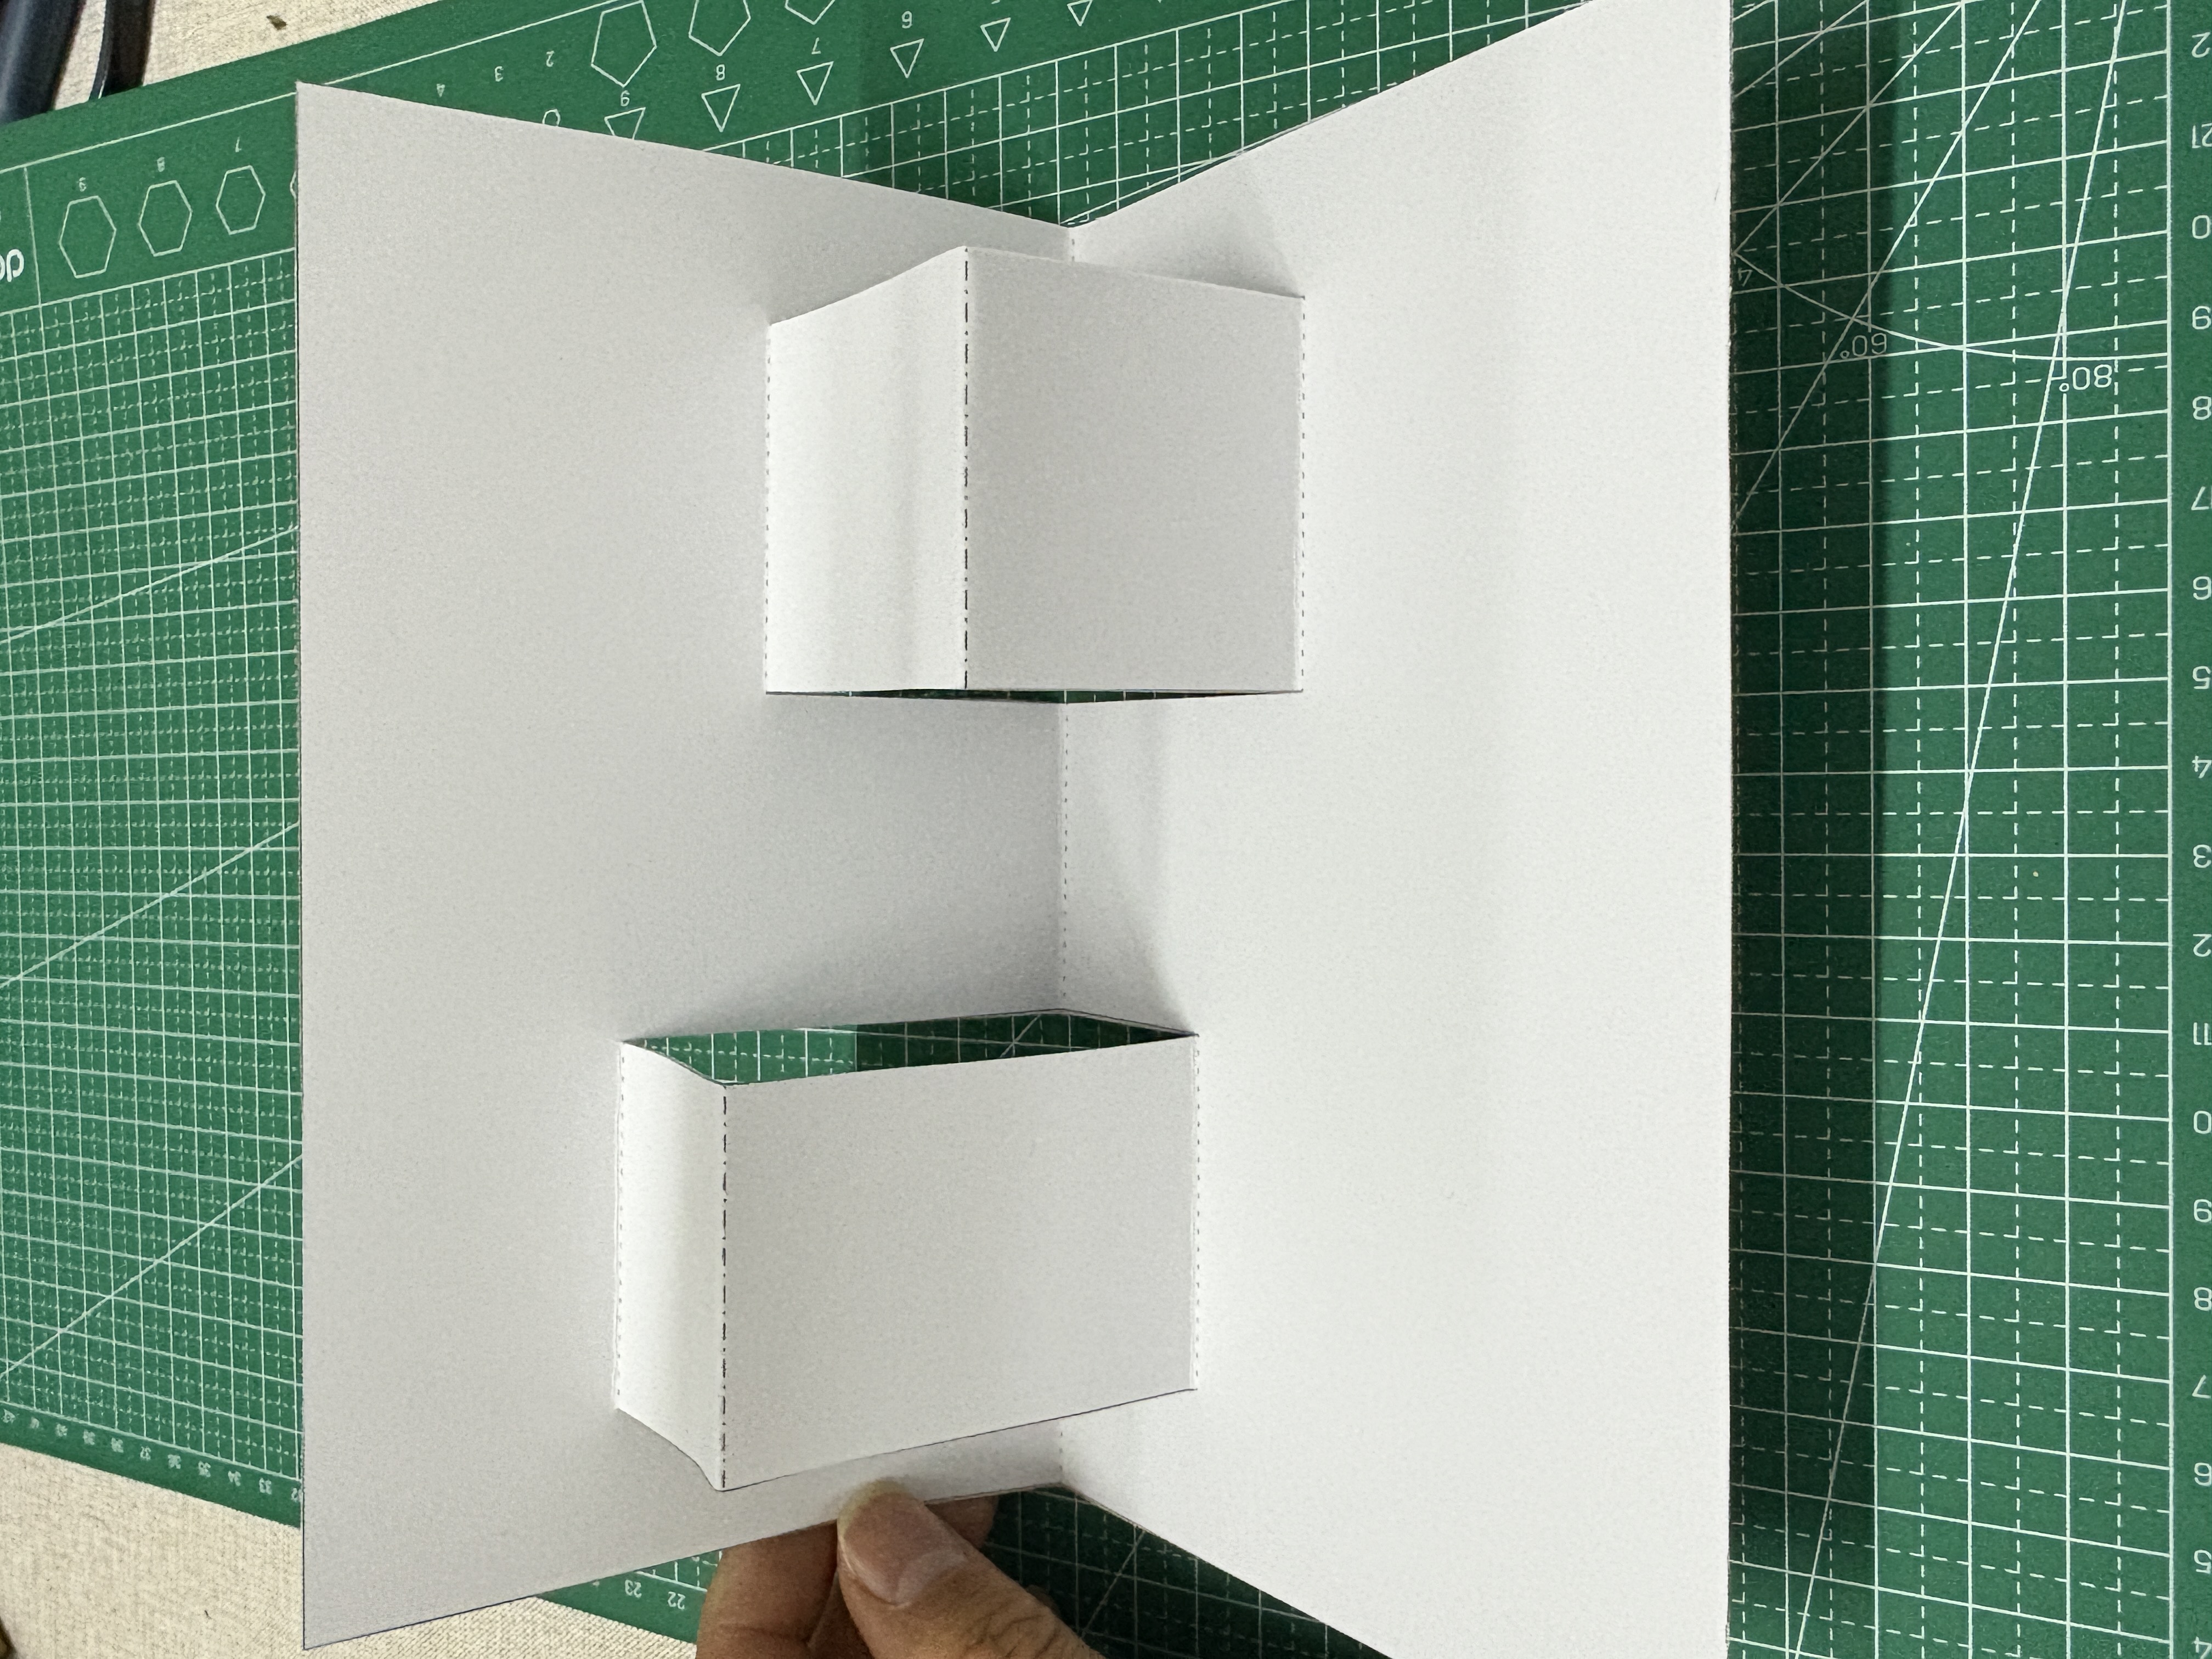
At this point, the base structure is complete. As shown below, the two parallel folds now form a raised pop-up step. When the page opens, the spatial layers become clearly visible, and this structure can now serve as the foundation for more decorative or more complex pop-up designs.
Note: Steps 2 and 3 currently reuse the Chinese visuals because separate English images were not provided yet.