The 180 degree reinforced tie-strip arch mechanism is an advanced version of a basic arch structure. By adding reinforcement strips, the mechanism not only rises naturally from flat to dimensional form, but also gains better stability, stronger support, and more controlled motion during opening and closing.
Compared with a standard arch mechanism, this reinforced version is better suited to complex scenes, decorative layers, and higher-quality pop-up book construction. When the strip length, angle, and placement are adjusted well, the arch opens more smoothly and is much less likely to collapse or deform.
Mechanism Category
Primary category: 180 Degree Structures
Core mechanism: Arch Mechanism
Reinforcement method: Tie-Strip Reinforcement
Structure type: Stability-Enhanced Advanced Structure
Let's fold it together. Here are the step-by-step instructions:
Step Guide
Step 1: Download the template and prepare the materials
Start by downloading the matching arch mechanism template and preparing the materials below:
- About 250g heavyweight cardstock, preferably Dutch paper or other high-gsm coated cardstock
- Scissors or a craft knife
- A cutting mat to protect the table surface
- A ruler for scoring and guided cutting
- A scoring tool, such as a needle, scoring stylus, or empty ballpoint pen
- Glue or double-sided tape
Key point:
The paper should not be too soft, or the arch will collapse easily. It should also not be too brittle, or the reinforcement strip area may tear.
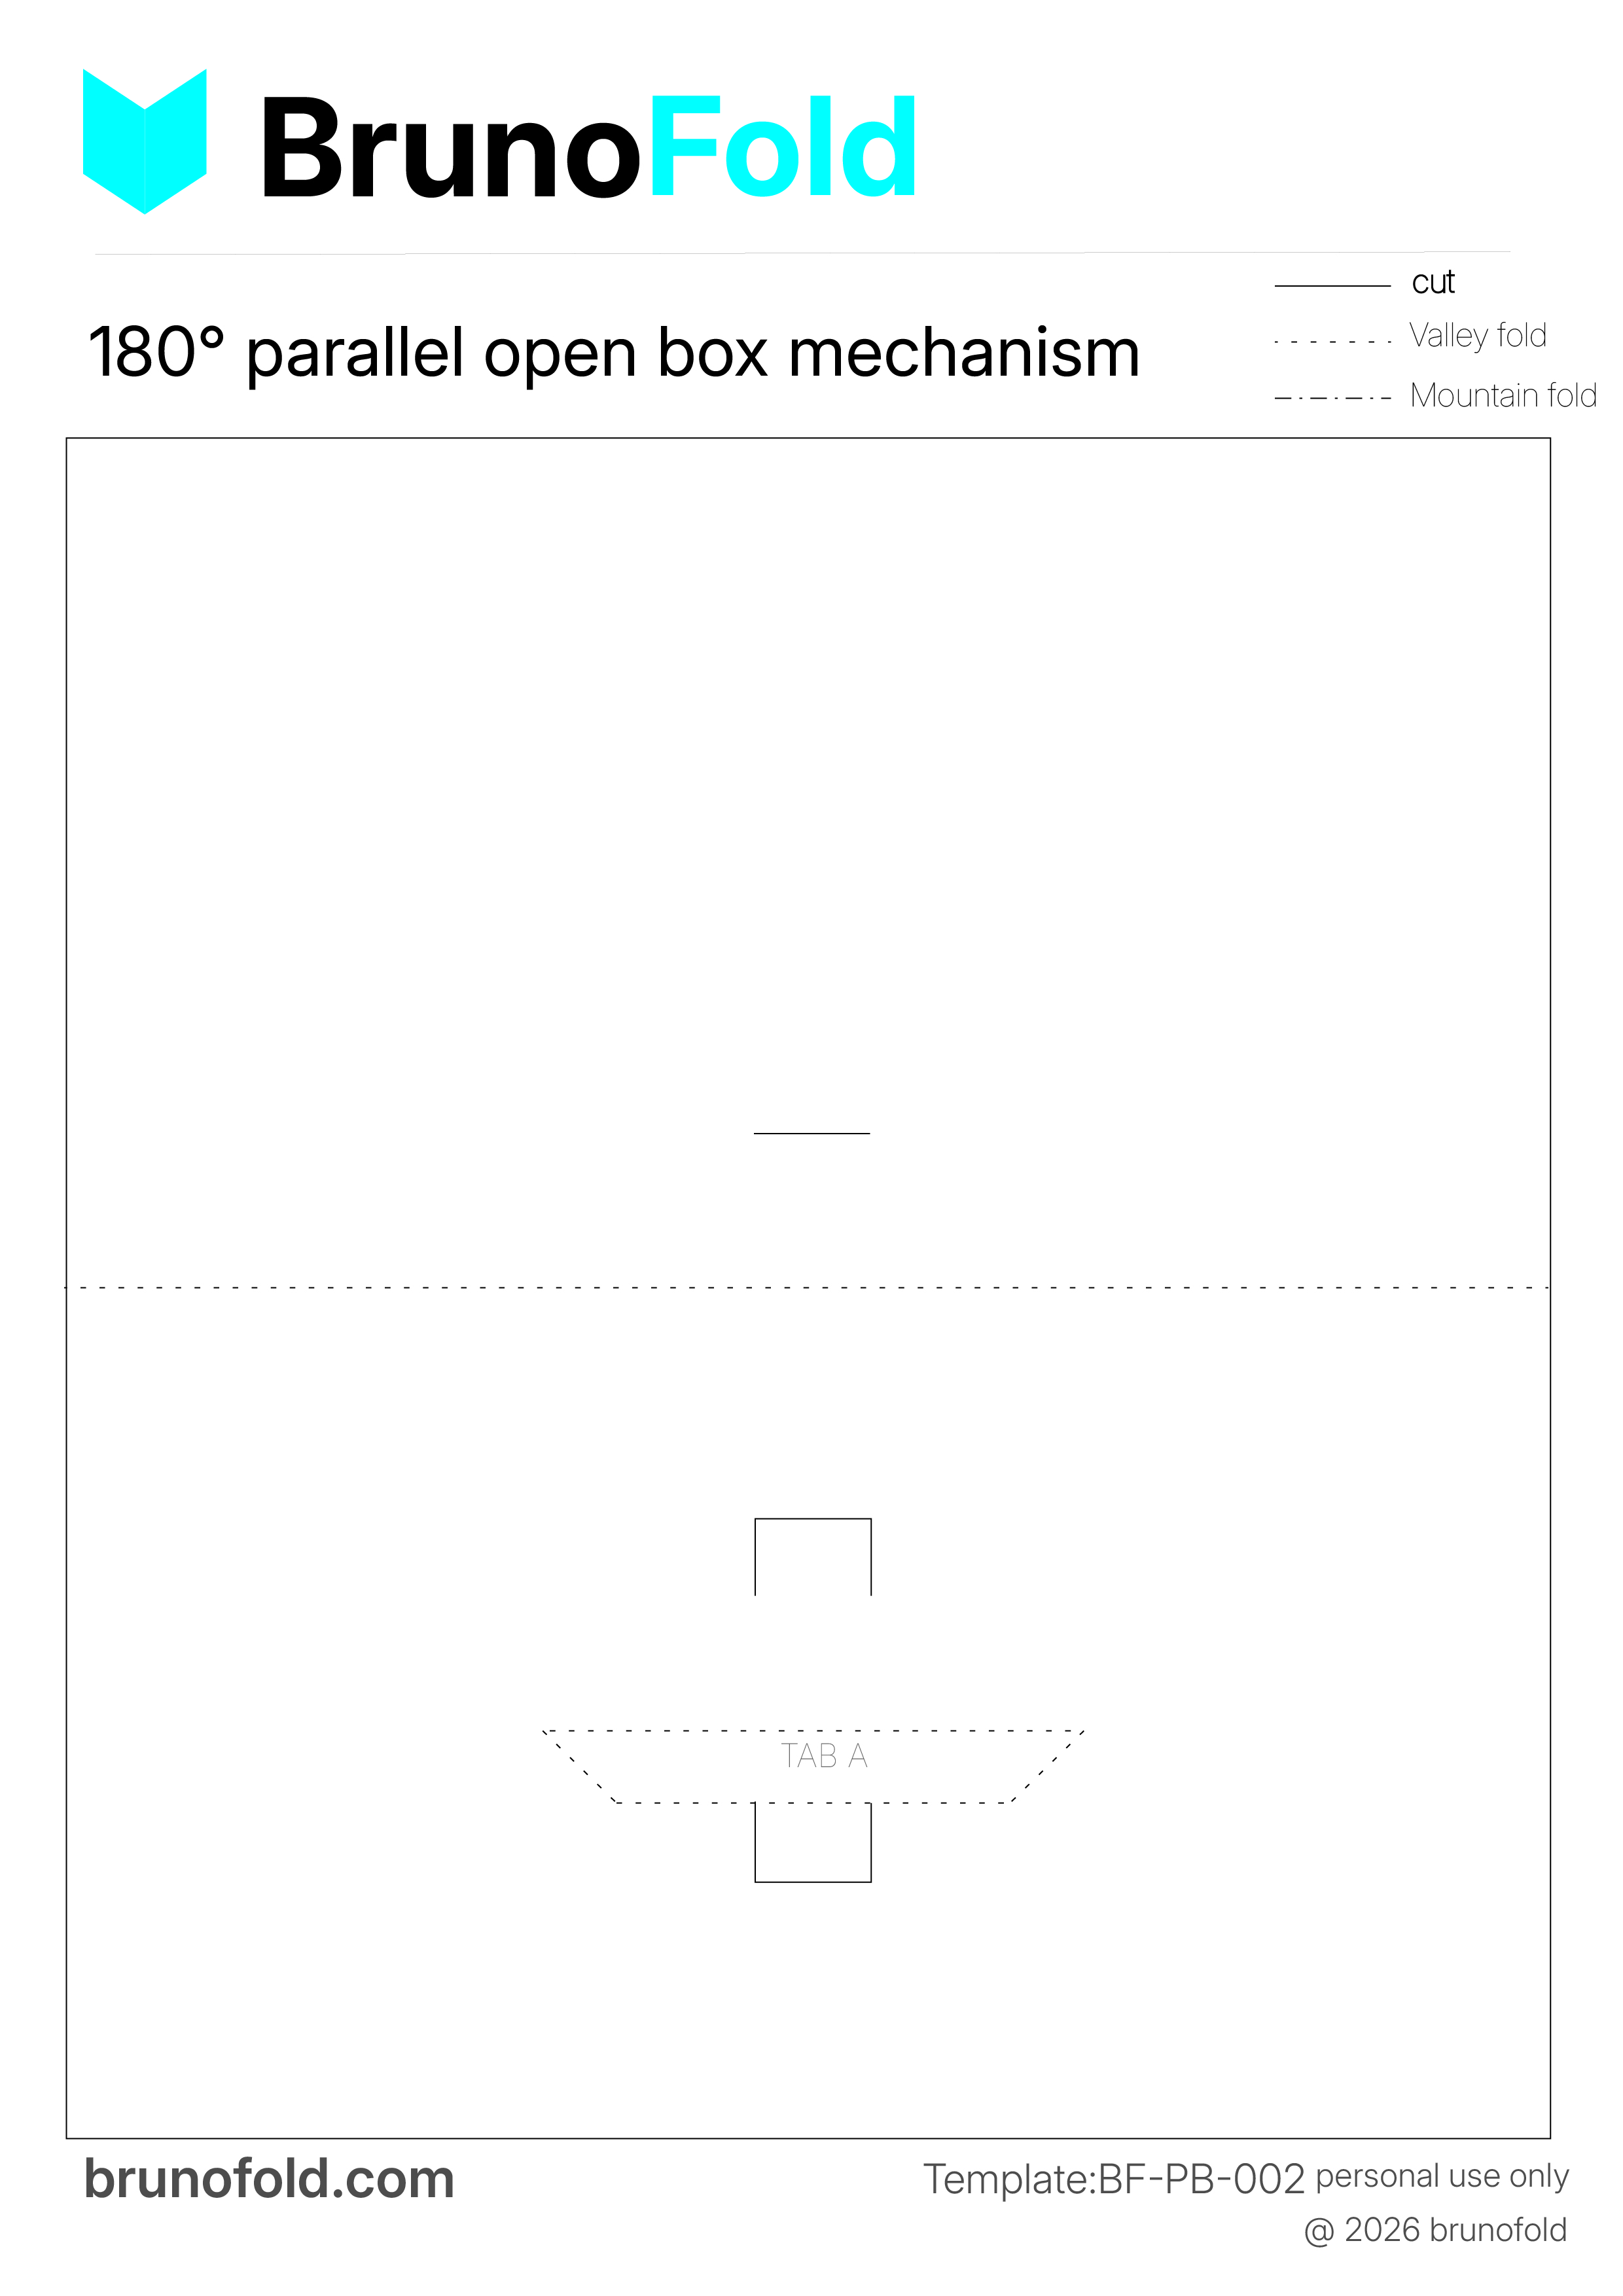
Step 2: Cut and score the structure
Cut the template accurately and pay special attention to these structural lines:
-
Solid lines: cut lines Keep the edges clean and sharp so rough fibers do not interfere with closing.
-
Dashed lines: fold lines that must be scored first Every fold line should be scored before folding. Otherwise, the structure may become:
- Inaccurate during folding
- Asymmetrical in the arch shape
- Uneven in force distribution
-
Main arch area Keep the curve complete. Do not cut through it or create hard corner breaks.
-
Reinforcement strip area Keep the strip width as even as possible. If it is too narrow, it may tear. If it is too wide, it may restrict movement.
Key point:
This step determines whether the structure will open smoothly, so do not rush.
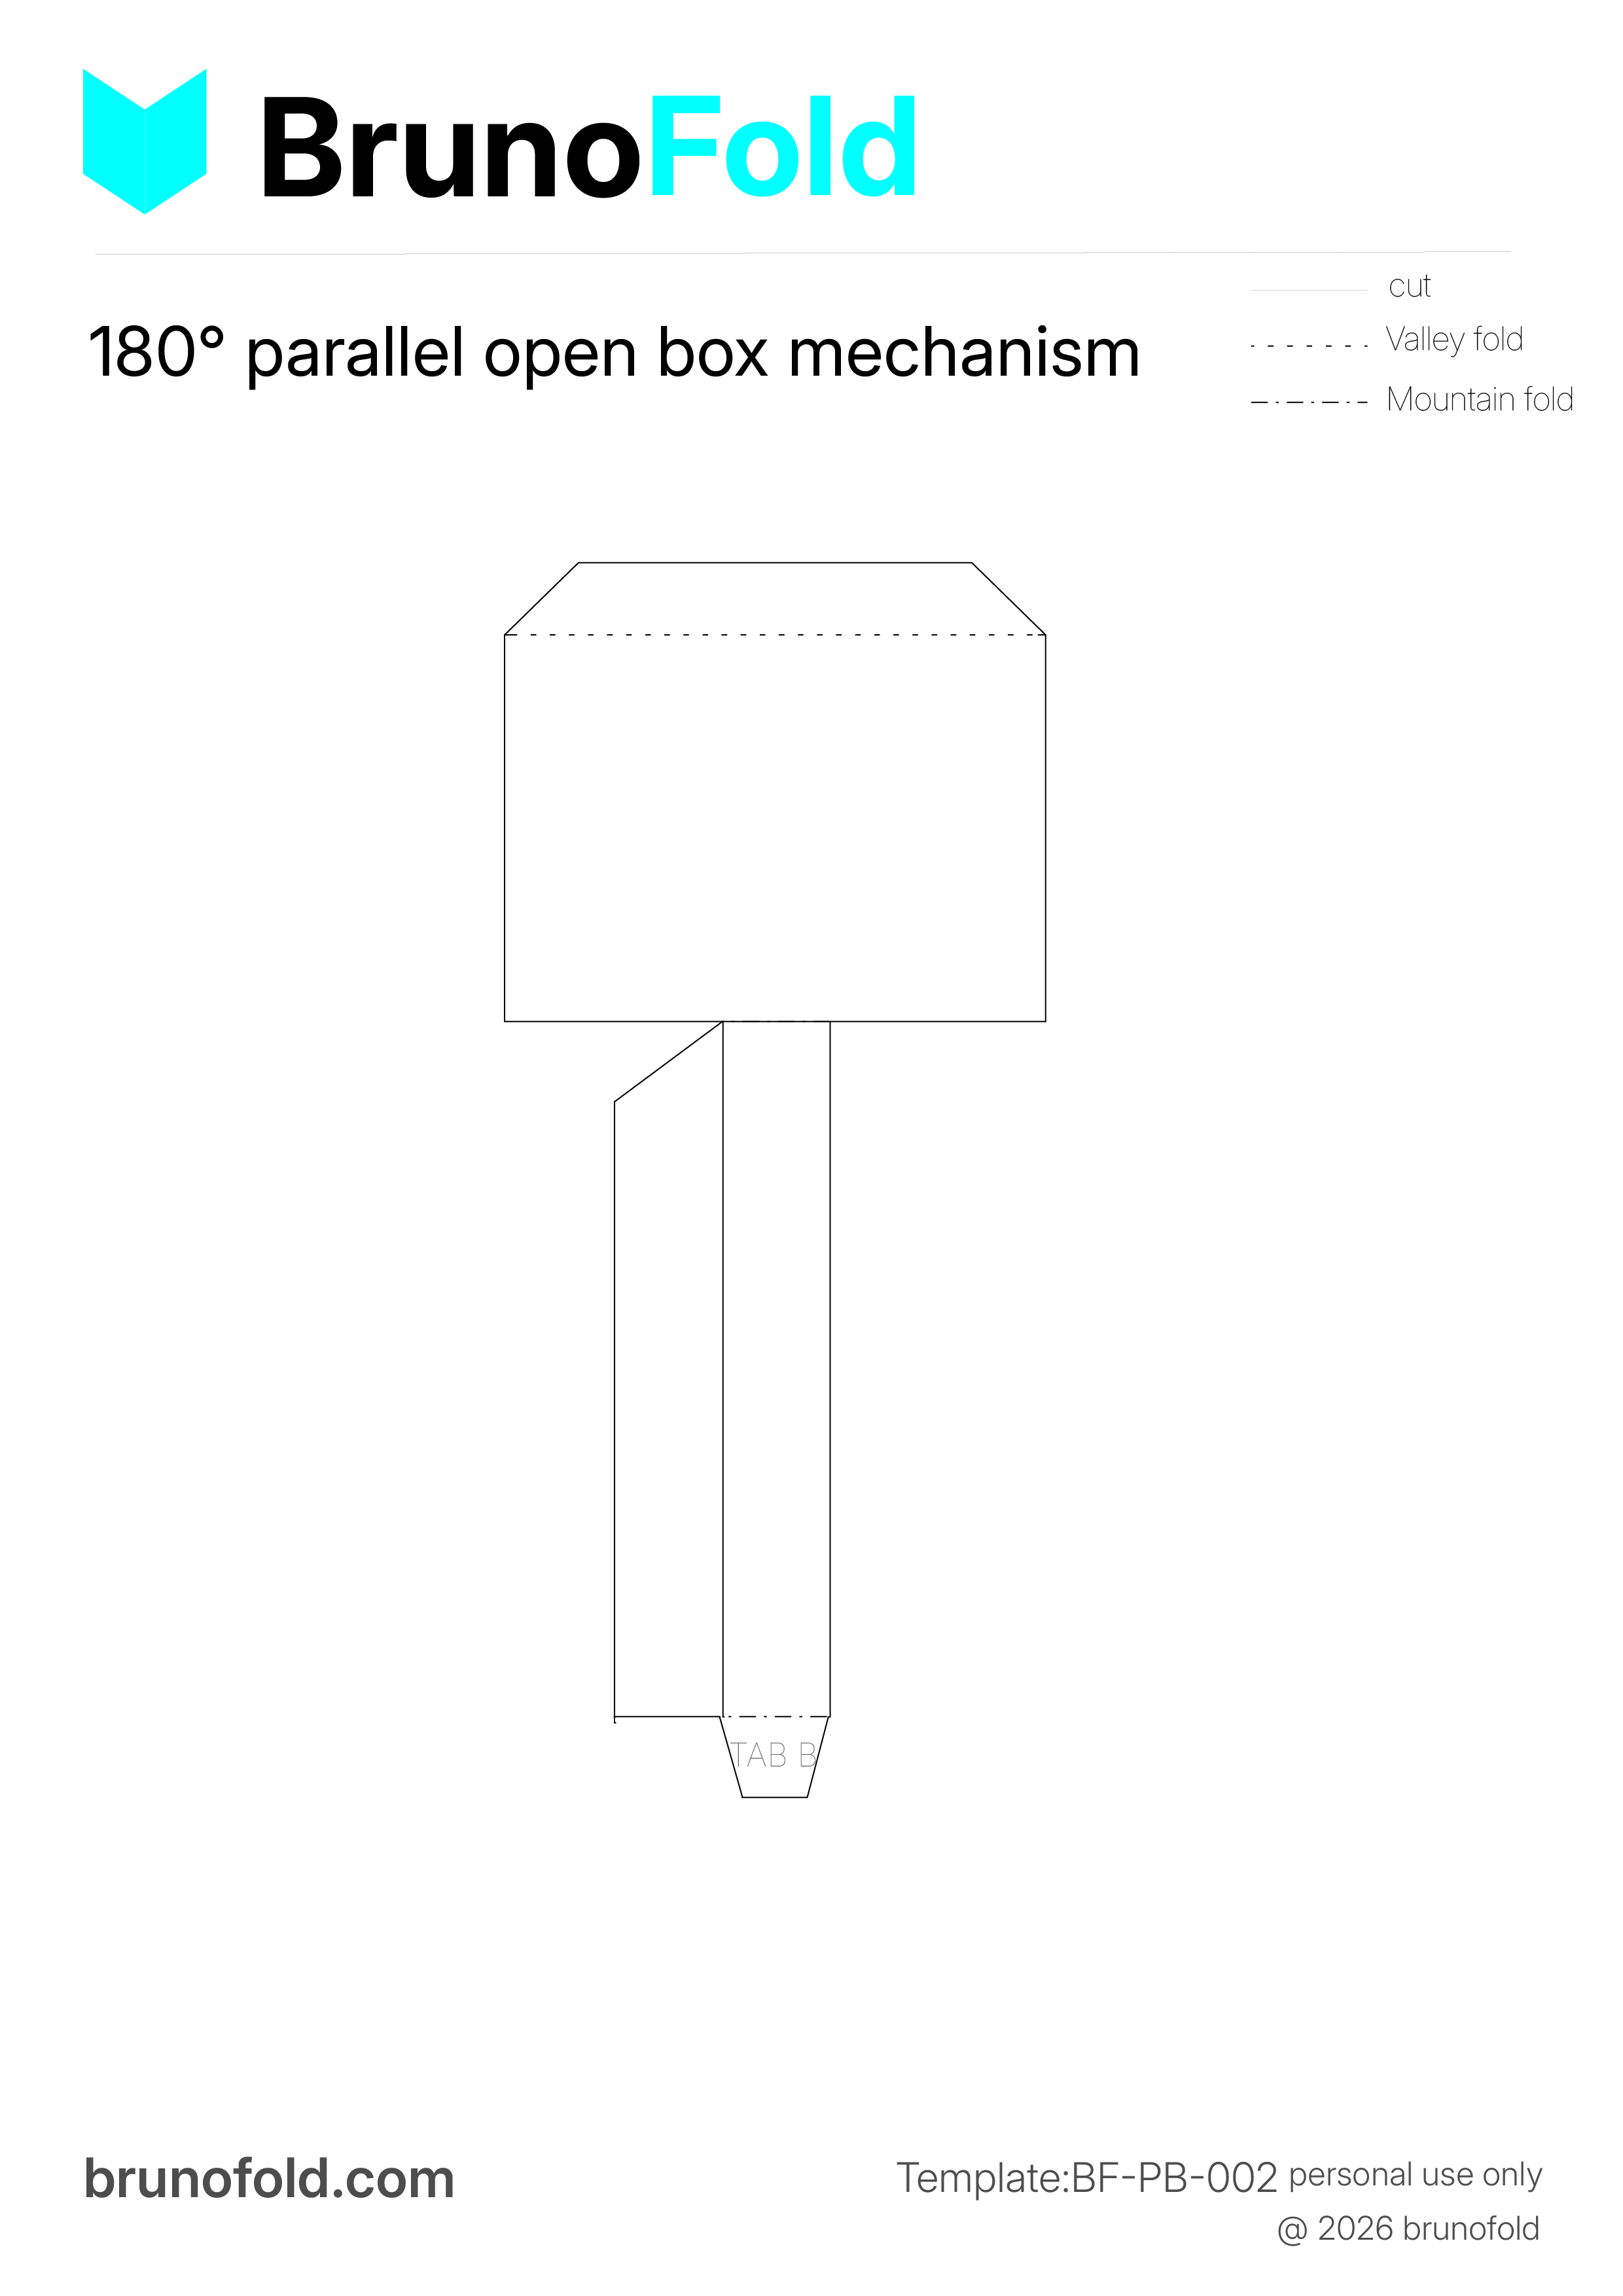
Step 3: Assemble the structure and reinforce it with the tie strip
This is the core stage for the stability of the whole mechanism.
-
Form the basic arch structure Fold the main arch body along the scored lines and make sure it can rise naturally.
-
Install the reinforcement strip Attach the strip to both sides of the arch or to the internal support points. The goal is not simply to fix the piece in place. The strip should:
- Control the opening height of the arch
- Limit the direction of structural deformation
- Provide additional support strength
- Adjust the strip length and angle This is the real make-or-break step. Focus on three variables:
- Length: if it is too short, the arch cannot open fully; if it is too long, the structure becomes loose and unstable
- Angle: a slightly inward angle is better than a perfectly horizontal one because it creates a more stable load-bearing triangle
- Placement: keep both sides as symmetrical as possible so the force stays balanced
- Final closing test and motion check Open and close the structure repeatedly and check:
- Whether it opens smoothly
- Whether the arch remains stable
- Whether twisting or drifting appears
Note: Steps 2 and 3 currently reuse the Chinese visuals because separate English images were not provided.
Next Article
180 Degree Reinforced Linkage Planar Mechanism: Stable Motion with Reinforced Connections